

Culottes, one of the most trendy styles of the 50's and 60's, are back! Culottes are flared pants or shorts that can often look like a skirt or a dress when you're wearing them. I have been trying to help you build a warm weather wardrobe that is both easy and practical –and that is easy to make. Here is another free pattern to add to your collection of projects for the summer.

“Culotte” is a French word that means the lower part of a garment or knee breeches. They have been fashionable since Henry III made them popular at court in France in the latter part of the 1500's and were worn mostly by the upper class. Later, in the time leading up to the French revolution in the 18th century, the lower classes who wouldn't have worn culottes became known as “sans-culottes” or literally “without short pants” — a term these partisans and revolutionaries embraced as they manned the street barricades.
There are two things I really like about this culottes tutorial and pattern –there is an option of adding front pockets to the pants without adding bulk to the tummy and you can easily transform them into long pants by adding length at the hem.
My choice of fabric is Jacquard Knit. This pattern is for knits only and comes in sizes 6 to 22. The finished garment measurements are printed on the pattern.
Materials:
- 1.5 yards of knit fabric. You might want to consider these fabrics.
- a ball point needle. We use Schmetz.
- stay tape or stretched fusible interfacing.
- a sewing machine
- rotary cutter and mat.
- a serger (optional)
Pattern sizes:
Finished Garment Measurements
 |
| There is a typo on the second column it should say lower waist. |
Pattern Pieces:
- 2 Backs
- 2 Fronts
- 2 Pockets Front
- 2 Pockets Back
- 1 Waistband (not included in the pattern). Please follow instructions on how to cut your waistband.
Features
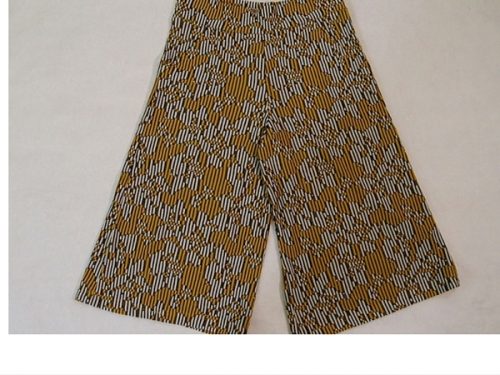
- These pants look like an A-line skirt or amazing super-elongating silhouette palazzo pants.
- A flattering feature in this pattern is the pockets in the front but they are OPTIONAL.
- A soft waistband that does not add bulk to the tummy area.
- For the girls that do not like to wear pants in summer, this is the perfect style to feel very comfortable and still look like you are wearing a skirt.
- 5/8″ seam allowance in all pattern pieces.

Step Two: Cut the fabric
Use a rotary cutter or very sharp scissors and as many pins or weights as you can so your fabric does not move while cutting. Pay special attention to the grain on the fabric indicated in your pattern.Step Three: Sew the pocket.
We will start by stabilising the seam and the opening of the pocket by adding fusible interfacing or stay tape. This step is a must because this area will stretch and become baggy if you do not use fusible interfacing.
Place the front pocket piece right side down on the front side of the pants. Prints are going to be facing each other. Sew the front pocket side to the front pants using a 5/8″ seam.


Turn the pant piece print side down and pin the seam allowance to the pocket.

Iron and stay stitch the seam allowance to 1/8″ from the seam. Trim the seam allowance, turn the pocket and iron.

Turn the pocket to the inside of the pants as it is going to hang and make 2 rows of stitches for decoration and for reinforcing the edge of the pocket. You can use your twin needle here as well.

Do the same to the other pocket. Trim the seam allowance, turn the pocket and iron.
Change your needle to a twin needle and stay stitch on the right side. The use of a twin needle is optional. To have the same effect without the twin needle just make 2 rows of stitches.
Turn the front side with the pocket you have been working on the print side down, place the back side of pocket on top of the front side of the pocket. Sew around the pocket at 5/8″.


Zigzag the edges or use the serger. Please note that many knits do not need the edges to be finished because they do not ravel. If they do, serge them.
Step Four: Assemble the culottes
Sew the 2 fronts together but stop 2 inches from the end.
Sew the back pieces the same way, stopping 2 inches from the end.

Sew the sides of the culottes and finish the seam either with a zigzag or a serger.

Sew the inseam and zigzag the edges or use your serger.

Step Five: check fitting and add the waistband
The pants at the waist should be close to your hips but not tights, there should be no gaps between the waistline and your hipbones. Adjust the pants according to your body, then measure the waist Culottes tutorial
cut a band 1 to 1.5 inches smaller than the measurement.

Fold the band in half. Sew the ends at 5/8″.

Fold the band lengthwise in half.

Mark the middle top and bottom by making a small notch with your scissors.

Pull the bands to distribute the stretch of the waistband evenly.

Using a small zigzag, stitch sew the waistband to the culottes. If you have a serger you can finish the seam with it.


Finish the edge with your serger or using a zigzag stitch. And there you have it. Done.
Whether you decide to make the culottes or the palazzo pants you are sure to have an outfit for many occasions. Team them up with a tank top or pretty blouse and you can go anywhere.
credit: So Sew Easy
-------------------------------------------------------------------------------------------------------------------Follow us on:
Facebook: https://www.facebook.com/mysewingmall/
Instagram: https://www.instagram.com/mysewingmall/
Twitter: https://twitter.com/MySewingMall
Website: https://www.mysewingmall.com
A women’s suit is the most versatile item a woman can own. It can be dressed up or down and worn for any occasion. Here are some tips on how to style a women’s suit for a casual outfit.
ReplyDelete